How to Build a Slackbot with Python
Shaked

With automation and productivity core values in the modern enterprise, it’s no surprise that Slackbots have garnered substantial interest from organizations and users around the globe. In this article we will explore what Slackbots are and do and then dive into how to build one!
What are Slackbots?
Slackbots are virtual assistants in a Slack workspace that can perform various functions in Slack, from sending automated messages, to alerts about important events, to triggering certain tasks—such as creating a Zoom meeting.
There are three main types of Slackbots:
- Reply bots: Respond to a message when someone uses a specific phrase such as mentioning the bot’s name or sending a message with specific content
- Notification bots: Monitor and watch the activities of other apps and send appropriate notifications and updates on Slack channels
- Slash command bots: A special kind of bot triggered by a command beginning with a slash
In this article, we’ll learn how to create a simple Slackbot using Python and Slack’s API.
Why use Slackbots?
Slackbots allow us to automate all our work-related procedures within a single application so that we don't need to go back and forth between various applications to perform a single task. As such, they help us to save time by allowing us to work more efficiently. They also help by facilitating the creation of a single, common platform where all our team members can be notified about important events automatically. We can use Slackbots to:
- View and update calendars
- Send notifications from applications such as JIRA, DataDog, Trello, and hundreds of others
- Save reminders and to-do lists
- Create polls and surveys
- Trigger processes or tasks in other applications such as Jenkins
- Store knowledge and resources
- Check emails
- Aggregate newsletters
As we can see, Slackbots can be incredibly powerful. These are just a few of the numerous possibilities offered by Slackbots, with yet more capacities available. No surprise, then, that Slackbots are already a popular tool, with more being created every day. Let’s jump in and learn how to build a Slackbot so we can start to reap their many potential benefits!
Building a simple Slackbot
Before we start building our bot, two simple prerequisites must be met. We need:
A Slack account: Go ahead and create an account, or simply log in.
Python 3.6 or newer: Download Python if it’s not yet installed.
Now we can get started on building our simple Slackbot.
Create the Slackbot
We’ll start by creating a Slack app. This will be our Slackbot that we’ll set up to perform tasks. Firstly, we need a workspace to install the bot. If we want to develop our bot in a new workspace, we can create one in a few simple steps.
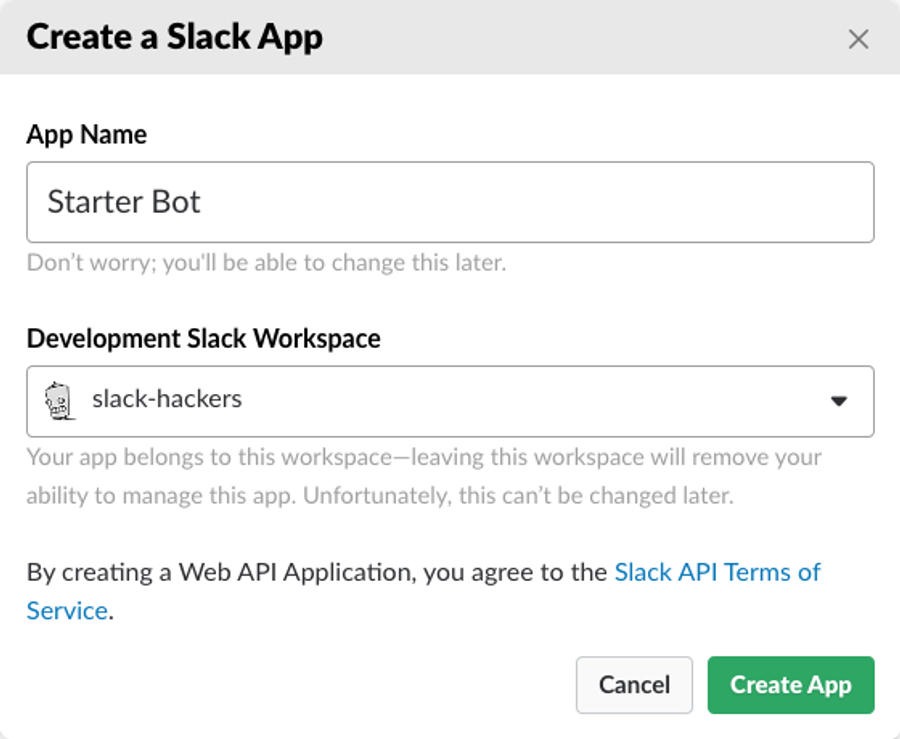
To create the app, navigate to the Slack app's dashboard for the Slack API. Click on “Create an App.” This will give us a couple of options; click on “Create your app from scratch.”
This will open up a form for us to enter the name of our Slackbot and choose the workspace where we want to build it. Create a name for the bot and choose the appropriate workspace. Click “Create App.”
Configure the Slackbot
After we have created the bot, we will be redirected to the bot’s configuration page, which looks like this:
Sack app information page
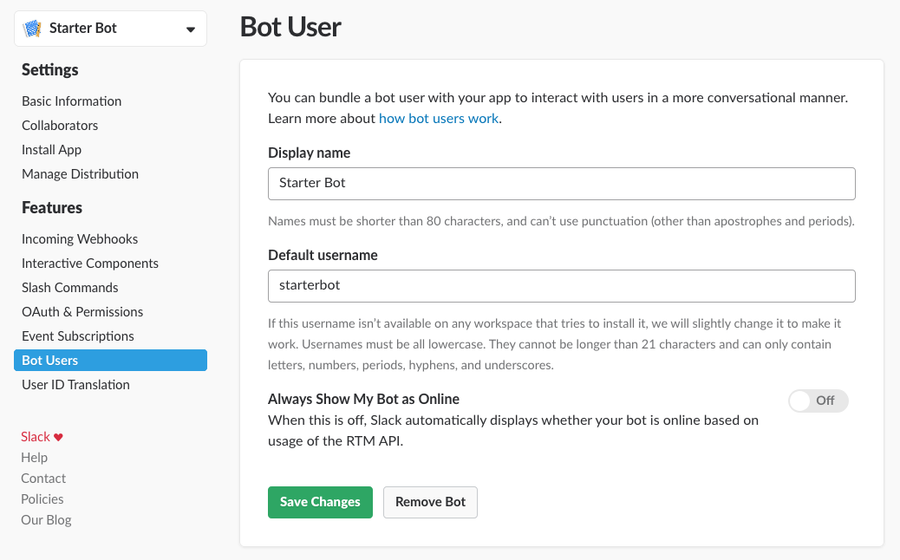
Here, we will be undertaking some necessary configurations so that our bot functions correctly and is able to perform the actions we require.
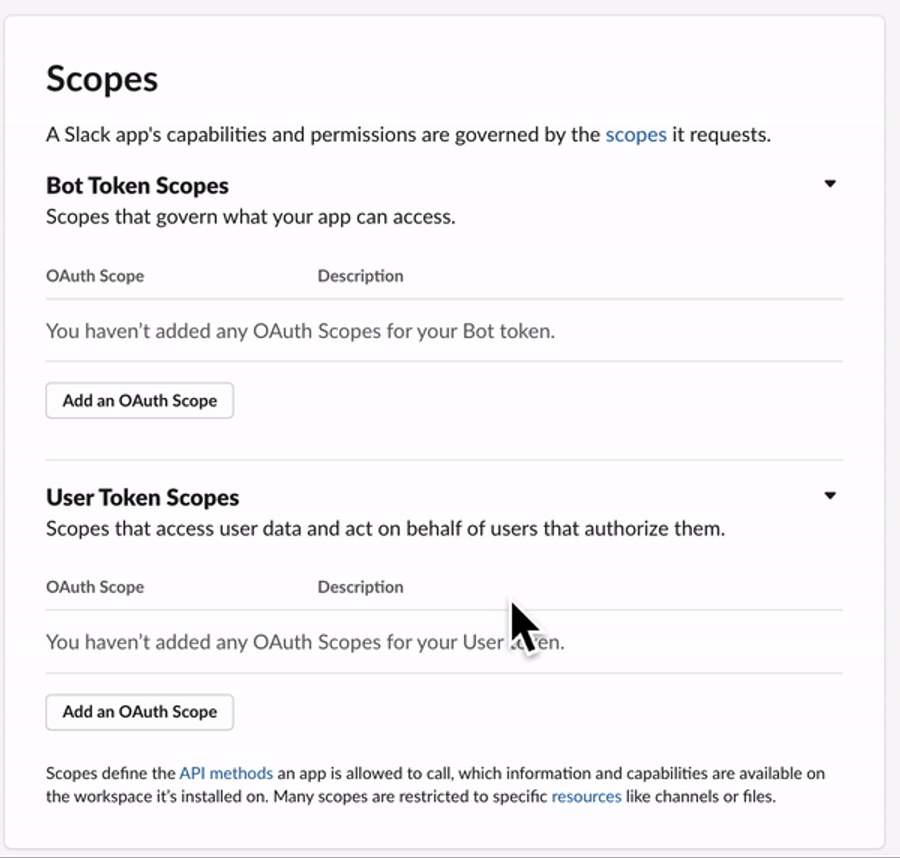
Add Scopes
Under the “Features” section in the left panel, go to the “OAuth & Permissions” tab. Navigate down to “Bot token scopes” and add the following scopes:
- app_mentions.read: This allows the bot to read the messages that mention our bot.
- channels:join: This allows the bot to join channels.
- chat:write: This allows the bot to send messages in a public channel.
Enable Socket Mode
The next step is to enable Socket Mode. If we weren’t using Socket Mode, we would need to expose a public HTTP endpoint through which the bot would interact within a Slack workspace; this is often not allowed in a corporate firewall. Using Socket Mode allows the Slackbot to use websockets for interaction.
To enable Socket Mode, click on the “Socket Mode” tab inside the “Settings” section of the left panel. Toggle the “Enable Socket Mode” button. Once the button is toggled, a pop up will appear to generate an app-level token - make sure to keep this token safe as anyone holding it has access to the entire organization’s messages.
Enter an appropriate name for the token and click on “Generate.” We’ll use the token later on in our Python code.
Generating an app-level token for Slack app
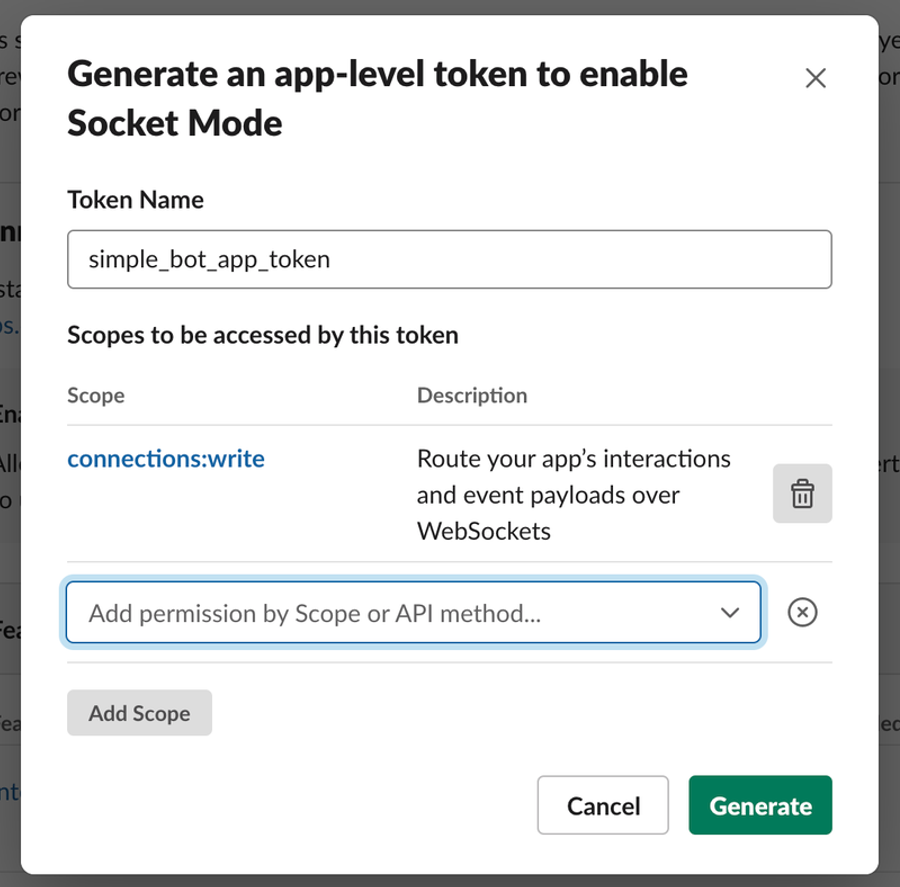
Click on “Done,” and ensure that Socket Mode is enabled.
Enable event subscriptions
The next step is to allow event subscriptions. This is an important configuration which will allow the bot to respond automatically to certain events, such as a direct message or mention. Navigate to “Event Subscriptions” under the “Features” section in the left panel and toggle the “Enable Events” switch to turn it on.
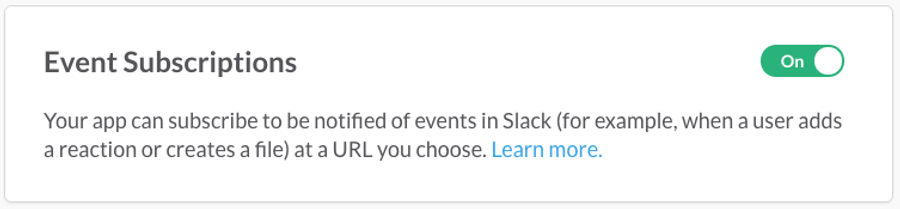
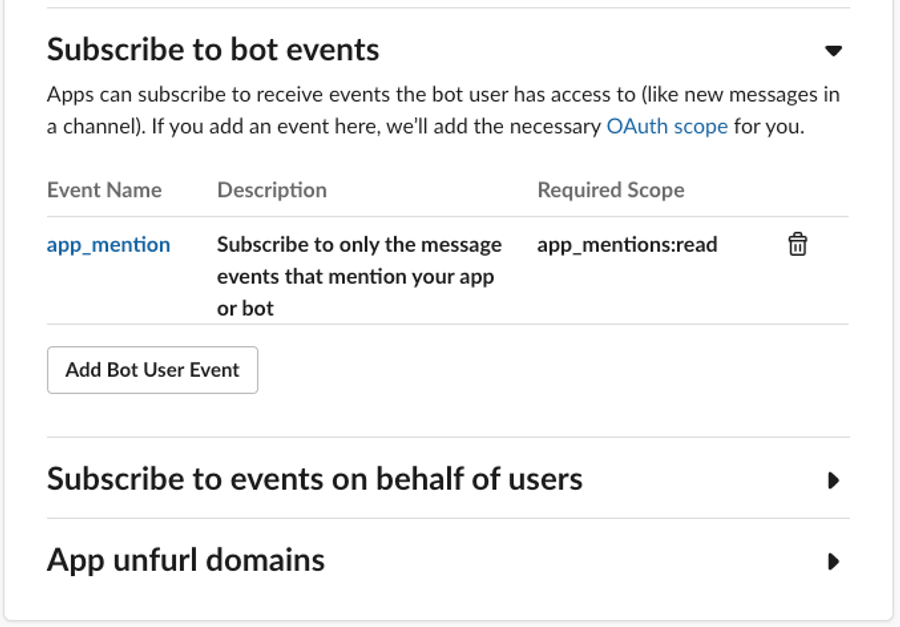
Once we do this, the page will display some extra sections. Click on the “Subscribe to the bot events” section to expand it, and then click on “Add Bot User Event.” Choose the “app_mention” event from options to subscribe, and click on “save changes.”
Install the Slackbot in a workspace
At this point, we have our bot configured properly, and it is ready to be installed in our workspace. Under the “Settings” section on the left panel, navigate to the “Install App.”
The flow to this step will depend on our restrictions and access permissions. If the workspace we’re installing on has restrictions, we will have the option to “Request to install” our app before we can go ahead and install it in that workspace. Otherwise, we can simply install our Slackbot.
Once the app has been installed to our workspace, a Bot User OAuth Token will be generated.
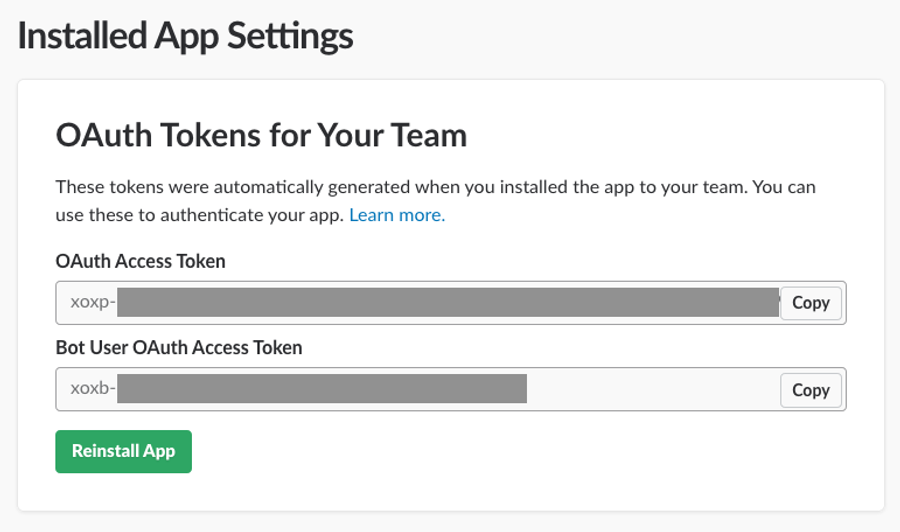
Copy this token and save it somewhere; we’ll be using this token as “SLACK_BOT_TOKEN” later in our code.
Next, we’ll write some Python code to listen to events and perform an appropriate action in response.
Set Up the Python Project
First, we need to set up our Python project:
1. Create and navigate to a directory for our project with the following commands:

2. Navigate to the project directory and create a virtual environment. This will serve as a space to install the necessary dependencies needed for this project. Run the following command to create the virtual environment:

3. Activate this virtual environment:

4. Install a few dependencies that will be needed to build the bot:

NOTE: If this command fails, try using `python3 -m pip`.
Coding to run the Slackbot
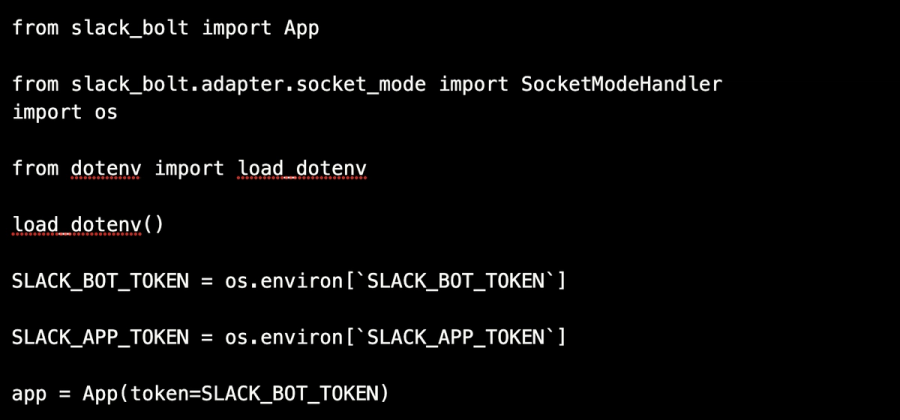
Finally, it’s time to write the code for our bot. We’ll start by creating a file with the name .env. The env file will store the “SLACK_APP_TOKEN” and “SLACK_BOT_TOKEN.” This is required in order to keep these tokens a secret. After we have created this file, we need to add the following code:

Next, create a file named app.py. This will contain the main code for our bot.
In the set-up phase, we added the “slack-bolt” as a dependency. Slack Bolt is a framework that helps us to develop a Slackbot easily and with the latest features. Slack API docs offer more information about Slackbot for Python. These docs can help us to customize our bot per our requirements, and to explore the full capabilities of the Slack API.
Next, we need code to allow our bot to respond to the messages in which it’s mentioned. Add the following code to the app.py file:

Here, we have defined a method mention_handler, this method contains all the business logic on what to do when someone mentions our bot by its name in a message. To make sure that this method is called automatically every time our Slackbot is mentioned, we use one of the method decorators @app.event("app_mention") provided by the Slack Bolt framework. It takes two parameters. The first parameter—body—is a JSON payload containing all necessary information about the message that the bot is responding to, such as the message text, user, and timestamp. The second parameter—say—is a method that is used to respond to a message. It takes a string, which is the message that will be sent in response as an argument. In this tutorial, we are responding with a simple message, but more complex tasks may be accomplished here.
Finally, let’s add the runner code to the app.py file:

This code will use the Slack Bolt framework to activate Socket Mode and allow the app to run.
Testing the Slackbot
Now, it’s time to test out the Slackbot we’ve made. It's a better option to test the bot in a new or test channel with limited audience, so that we can test that it is working properly before we use it in channels with a wider audience.
Select the new or test channel. Add the bot to this channel by typing the message “@my-slack-bot” in the channel. This will open a popup similar to the one below; click “Add to Channel.”
If everything is successful, we’ll see the message <appname> app is running! as output in the terminal.
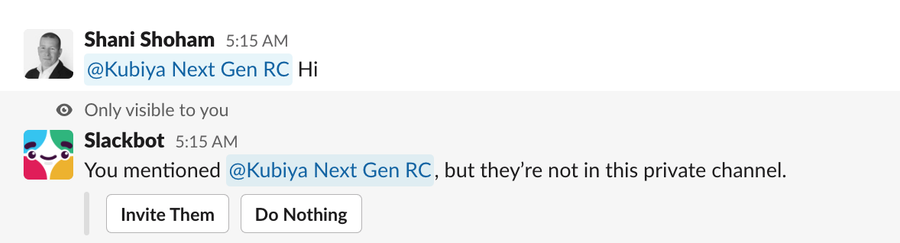
Next, we’ll send a message by mentioning our bot in Slack.
Going beyond Slackbots with conversational AI
In this tutorial, we took the time to create a simple Slackbot that responds with a message whenever it is mentioned in a channel. This is just the tip of the iceberg in terms of Slackbot capabilities, with Slackbots offering the potential to automate all kinds of processes for improved efficiency.
However, creating these slackbot and maintaining them takes a lot of sweat, blood and tears. Additionally, Slackbots are unable to learn from user interactions and cannot assist users with anything that goes beyond their canned, predefined flows.
To address these challenges, Kubiya’s AI-driven virtual assistant makes it easy for users to trigger complex DevOps operations and converse with engineering platforms using simple conversations. Using Kubiya developers and other organizational users will be able to easily access cloud resources, trigger workflows and find information all via simple conversations in Slack, Teams or even CLI.
This is a win-win for both operations and development, as development can get what they need, when they need it (with appropriate access control in place) without over-burdening operations with repetitive requests and tasks.